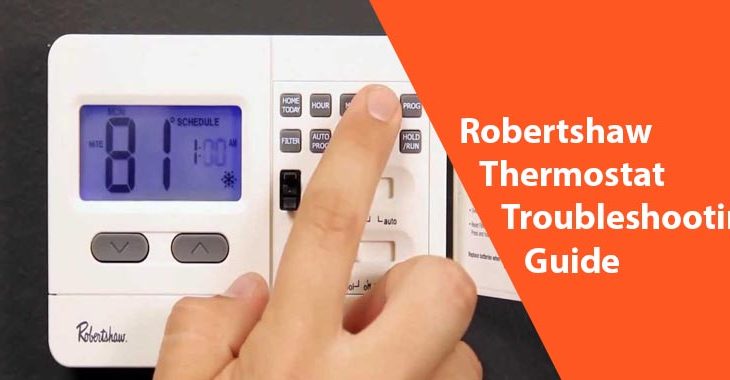
Robertshaw Thermostat Complete Troubleshooting Guide
Thermostats are an essential part of homes in thermo-regulation. Robertshaw thermostat is one such product offering temperature control at budget-friendly prices. Like many gadgets, it has its shortcomings once in a while. For any home user, knowing the source of the problem, troubleshooting and returning your device to a proper working condition is essential.
Many of these malfunctions depend on the cause of the problem. They range from display issues, programming, or just faulty hardware. This article offers some of the solutions to your thermostat issues.
Robertshaw Thermostat Troubleshooting
Here are some of the most common problems you will experience while using a Robertshaw thermostat and how to fix them.
How Do I Reset a Robertshaw Thermostat
Pressing the reset button erases the thermostat’s programming.
You can unlock the thermostat by pressing the RESET button on the back of the faceplate, found at the bottom right of the thermostat where there is a round hole. You can use a sharp object or point to press the button in the hole. A pencil or ballpoint pen to can serve this purpose resets the thermostat and deletes the lock code. Turn off the dipswitch if you do not want to use the lock feature. Lock-on switches 2 and press the RESET button.
 No LCD on My Thermostat
Battery-powered thermostats often have this problem. The problem can be as a result of the terminals of your cells not touching or not appropriately oriented. To solve this remove the battery compartment and verify if everything is in order. It could also happen if your batteries are drained
Robertshaw 9600 Mode Switch Failure
Mode switches help in heating or cooling. They signal the furnace as to whether cold or heat. Contact with air causes corrosion which compromises temperature readings. This result, not turning on of the thermostat at the appropriate time due to poor translations. The solution is cleaning the copper contacts and switches.
Wrong Temperature Reading
Air infiltrations from the wall cavities and external interferences like lamps that may cause a surge in heating may influence false readings. To solve this, seal the space between the wall cavities and the thermostat and place lamps far away from the device. Another plausible cause of the problem is temperature diode disconnection. The conditioner will fail to turn on or turns on at the wrong time. The solution is re-soldering your diode.
READ ALSO: How to Program a Hunter thermostat
How to Change Batteries in a Robertshaw Thermostat
Alkaline batteries offer your thermostat constant current and voltage to carry out its intended purpose.
Pull the wall thermostat housing. Mostly if this isn’t achievable, sliding the house will do it off a wall mount. Turn the housing over to inspect the back where mostly the battery slots are. Remove the old batteries replacing them with the new ones you have just purchased. Return your thermostat to the wall.
Thermostat Turns AC Off and On Constantly
When the temperature differential is too small, your thermostat senses temperature changes quickly. The result is constant on and off. To solve this, increase the temperature differential. This ensures you don’t get these rapid and continuous changes.
How to Connect a Robertshaw Thermostat to Wi-Fi
WiFi enables you to connect your thermostat to your smart device. Place your thermostat on set up mode. The next step is locating your thermostat on your smart device. Your thermostat should appear on the list of available devices.
Since it is an open network, you won’t need to input a password. Your Robertshaw thermostat will generate its wifi and connect to your home wifi network. Your device will then exit set up mode and start operating as usual after this in a few minutes mostly 3 minutes if no error suffices.
How to Program a Robertshaw Thermostat
Programming a thermostat ensures that your house has the requisite temperature at various times of the day. Some of these wall thermostats usually are factory programmed and may not meet your home heating and cooling requirements. If faced with such a situation, the logical move is usually programming.
The first thing is usually programming Date and time since they play a crucial role in temperature control. Various times of the day record varied temperature ranges. Also, it is important to note that if you go to work daily and exit your home at certain hours, your thermostat may be programmed differently compared to working at the home individual.
Setting Date
- Press and release the SET and PROG/MAN buttons simultaneously to access clock and calendar.
- Enter the UP or DOWN arrow buttons until the on-screen clock reflects the correct current time;
- Press SET to lock time.
- Use the UP and DOWN buttons to the preferred day of week indicator: select 1 for Monday, 2 for Tuesday, 3 for Wednesday, 4 for Thursday, 5 for Friday, 6 for Saturday, or 7 for Sunday. Press SET to lock this when your desired day shows.
Step 2 (Adjusting Temperature)
Adjusting the temperature of your thermostat is the next step.
- Use the UP and DOWN arrow buttons to make adjustments to your desired temperature.
- Press SET to lock the temperature.
- Repeat the same procedure to set the second temperature using the digital display screen.
Step 3 (Choosing the Weekly Heating Program)
Quick Set enables you to set a seven-day heating and cooling program.
- Adjust the COOL/OFF/HEAT/EM” switch allowing for selection of the desired operating mode for Quick Set program.
- Hold down the SET button, then DOWN arrow button, finally let go simultaneously.
- Use the arrow buttons to adjust the start time for the morning program when the (morning) MORN indicated on display.
- Enter the SET button to lock-in.
- Repeat the similar procedure to set the start times for the DAY, EVE(evening), and NITE (night) program segments.
READ ALSO: Best Location for a Thermostat in Your House
Step 4 (Customizing Days)
Depending on your work schedule, you can program your thermostat to have varying temperatures on the weekends or days that you are at home.
- Use the COOL/OFF/HEAT/EM Cool/Off switch for selecting the preferred operating mode when programming each day individually.
- Press SET to access the programming screen.
- Select the desired day of the week, using the arrow buttons then press SET.
- Choose the program segment to modify and press the SET button.
- Use arrow buttons adjusting to the desired start time for the selected portion displayed on the screen; press SET button.
- Repeat this step to specify the start times for the remaining days of the week or to program the heating or cooling schedule for other days.
Step 5 (Fan Setting)
Use the Fan /AUTO/ON switch. If you desire to run your fan automatically select the auto option, however, if you opt for the ON button, then your fan will run continuously.
The next step is selecting between the HEAT or COOL options. Use the COOL/OFF/HEAT/EM switch to choose your option. Press the selection, and you are all set.
Step 6 (Activating Program)
The final step that ensures all your entered settings are saved and executed by the thermostat.
Press the PROG/MAN button until the PROG indicator displayed on the digital screen. This saves all your changes, and your thermostat is set to work as per your preferences.
Robertshaw thermostat is relatively easy to troubleshoot. Most problems may be as a result of hardware or programming most of which are easy to correct. In case of more complications enlisting the services of the experts would come in handy.